Accessing Single-Cell Analysis Results via Shiny App
NIH · Biowulf HPC · HPC OnDemand · hpcondemand.nih.gov
These instructions will guide you through launching a Shiny App on the NIH Biowulf HPC cluster via HPC OnDemand to interactively explore single-cell analysis results. No command-line experience is required. Please have your PIV card and PIN ready before you begin.
Note: You must be on the NIH network or connected via VPN for this site to be accessible.
Step 1 — Navigate to the HPC OnDemand Portal
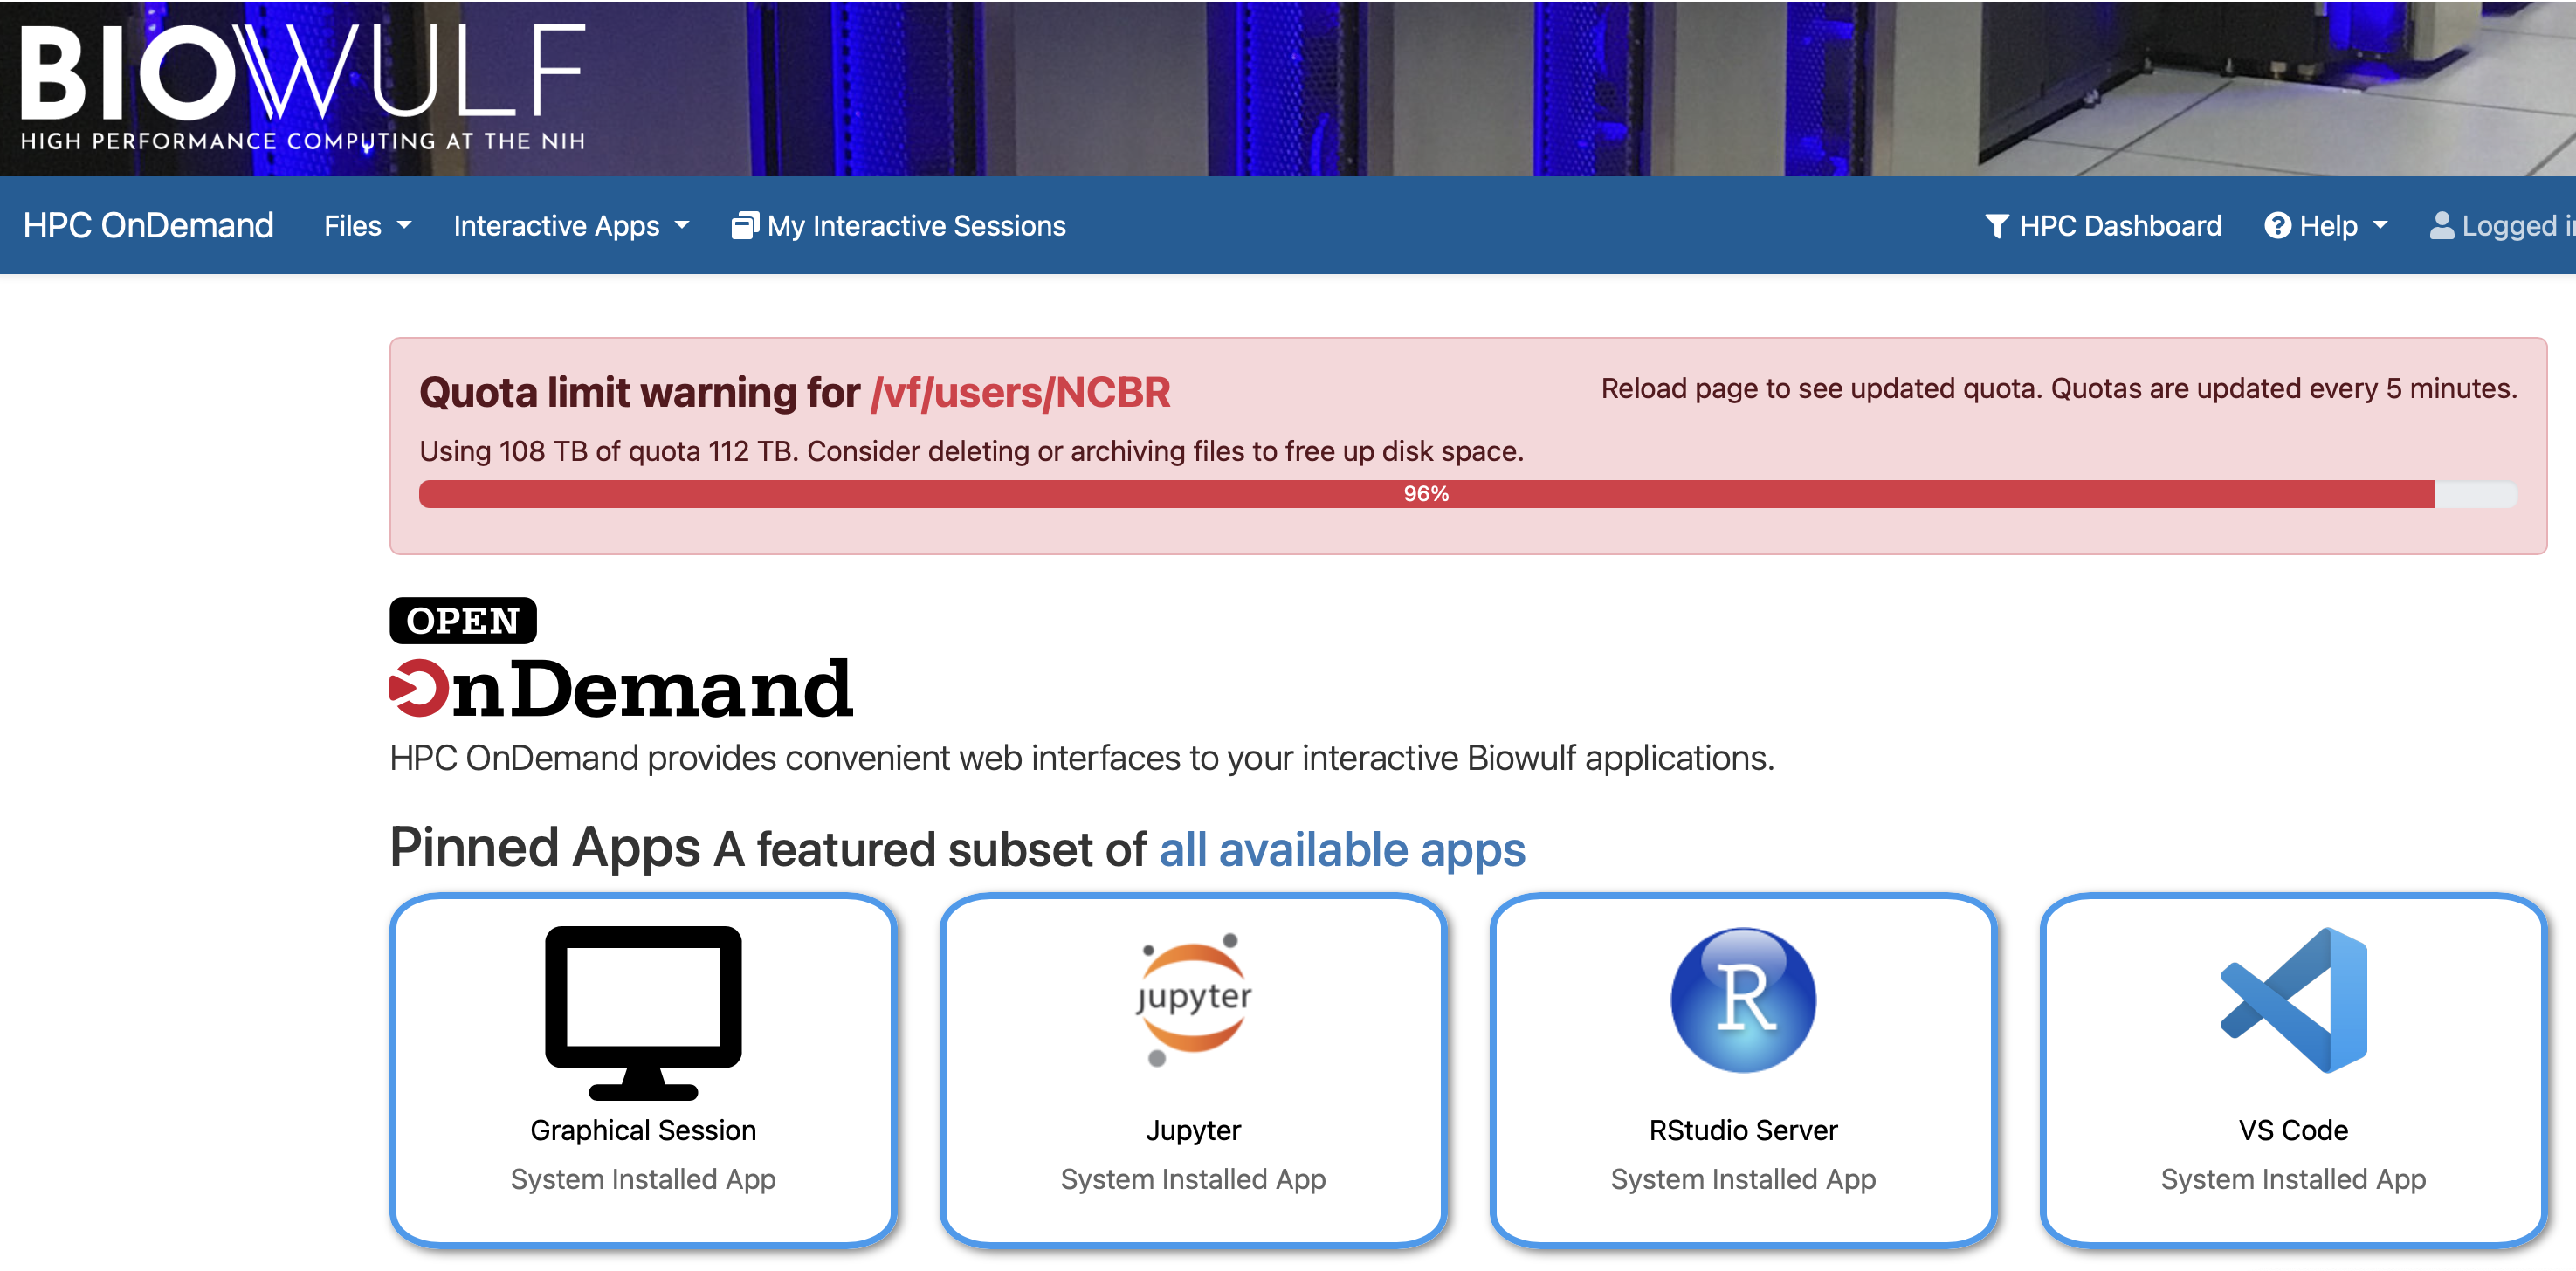
Open your web browser and go to https://hpcondemand.nih.gov. When prompted, authenticate using your NIH PIV card and PIN. You will land on the HPC OnDemand home page.
Step 2 — Open the All Available Apps List
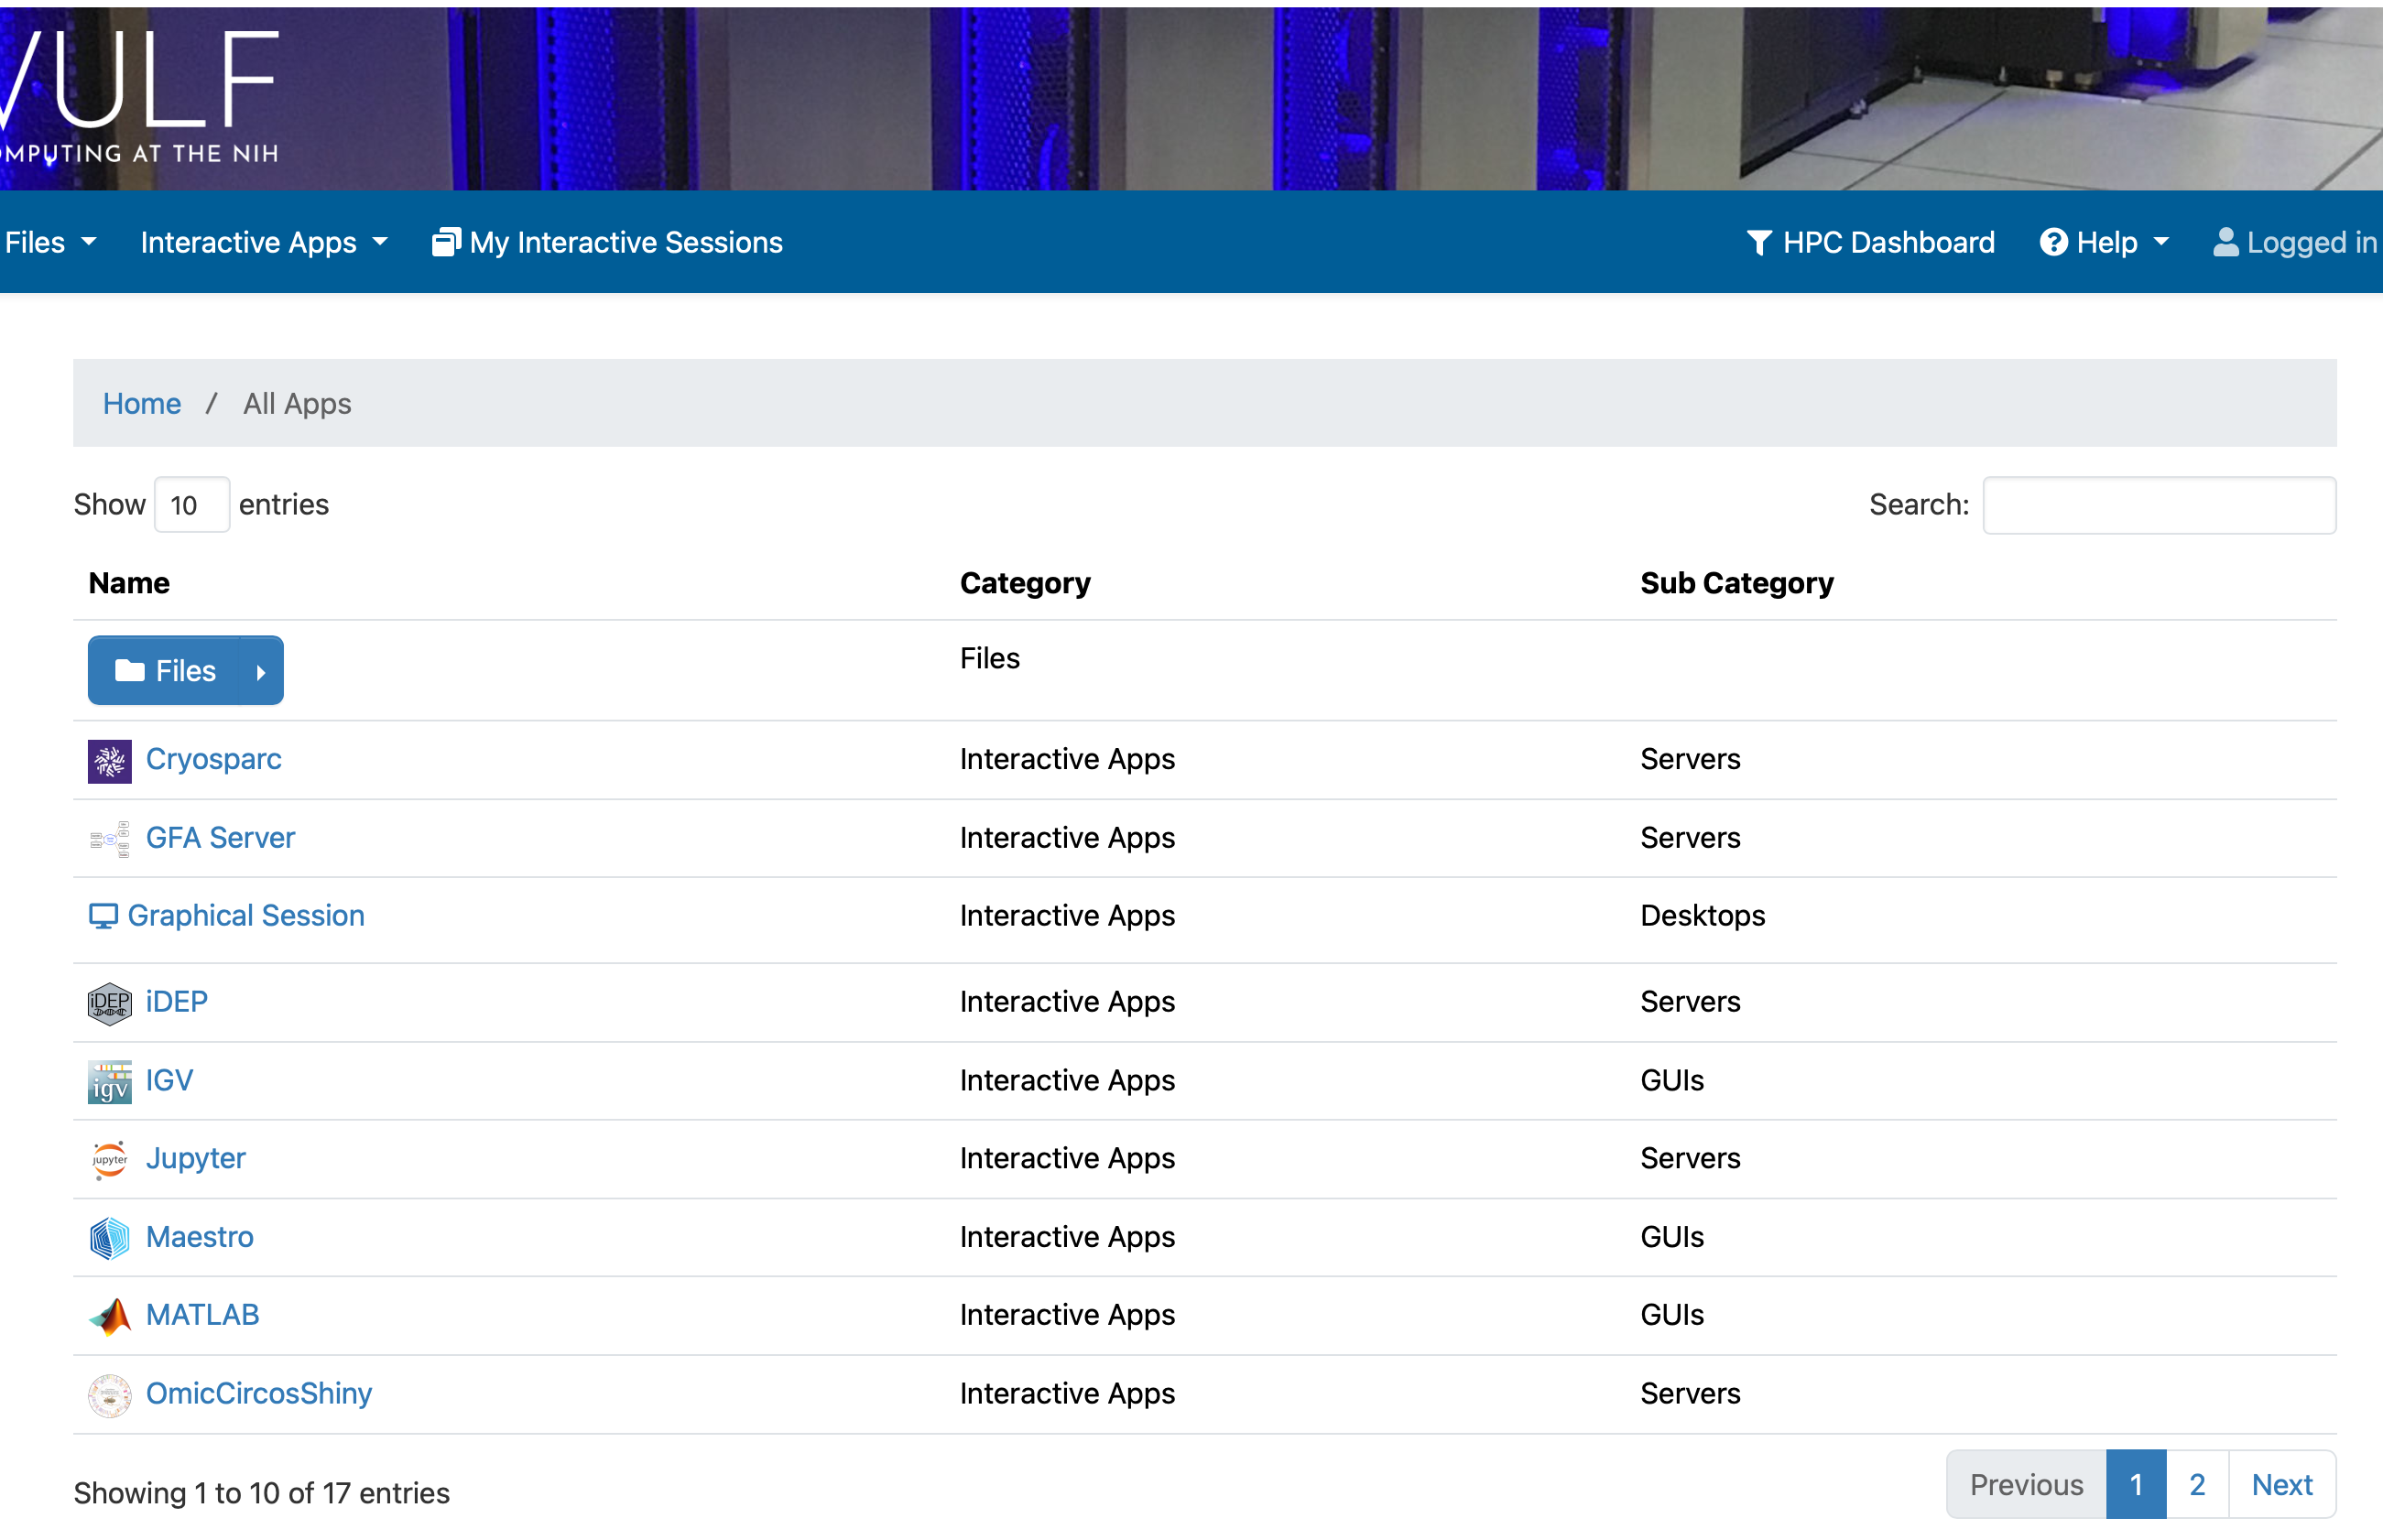
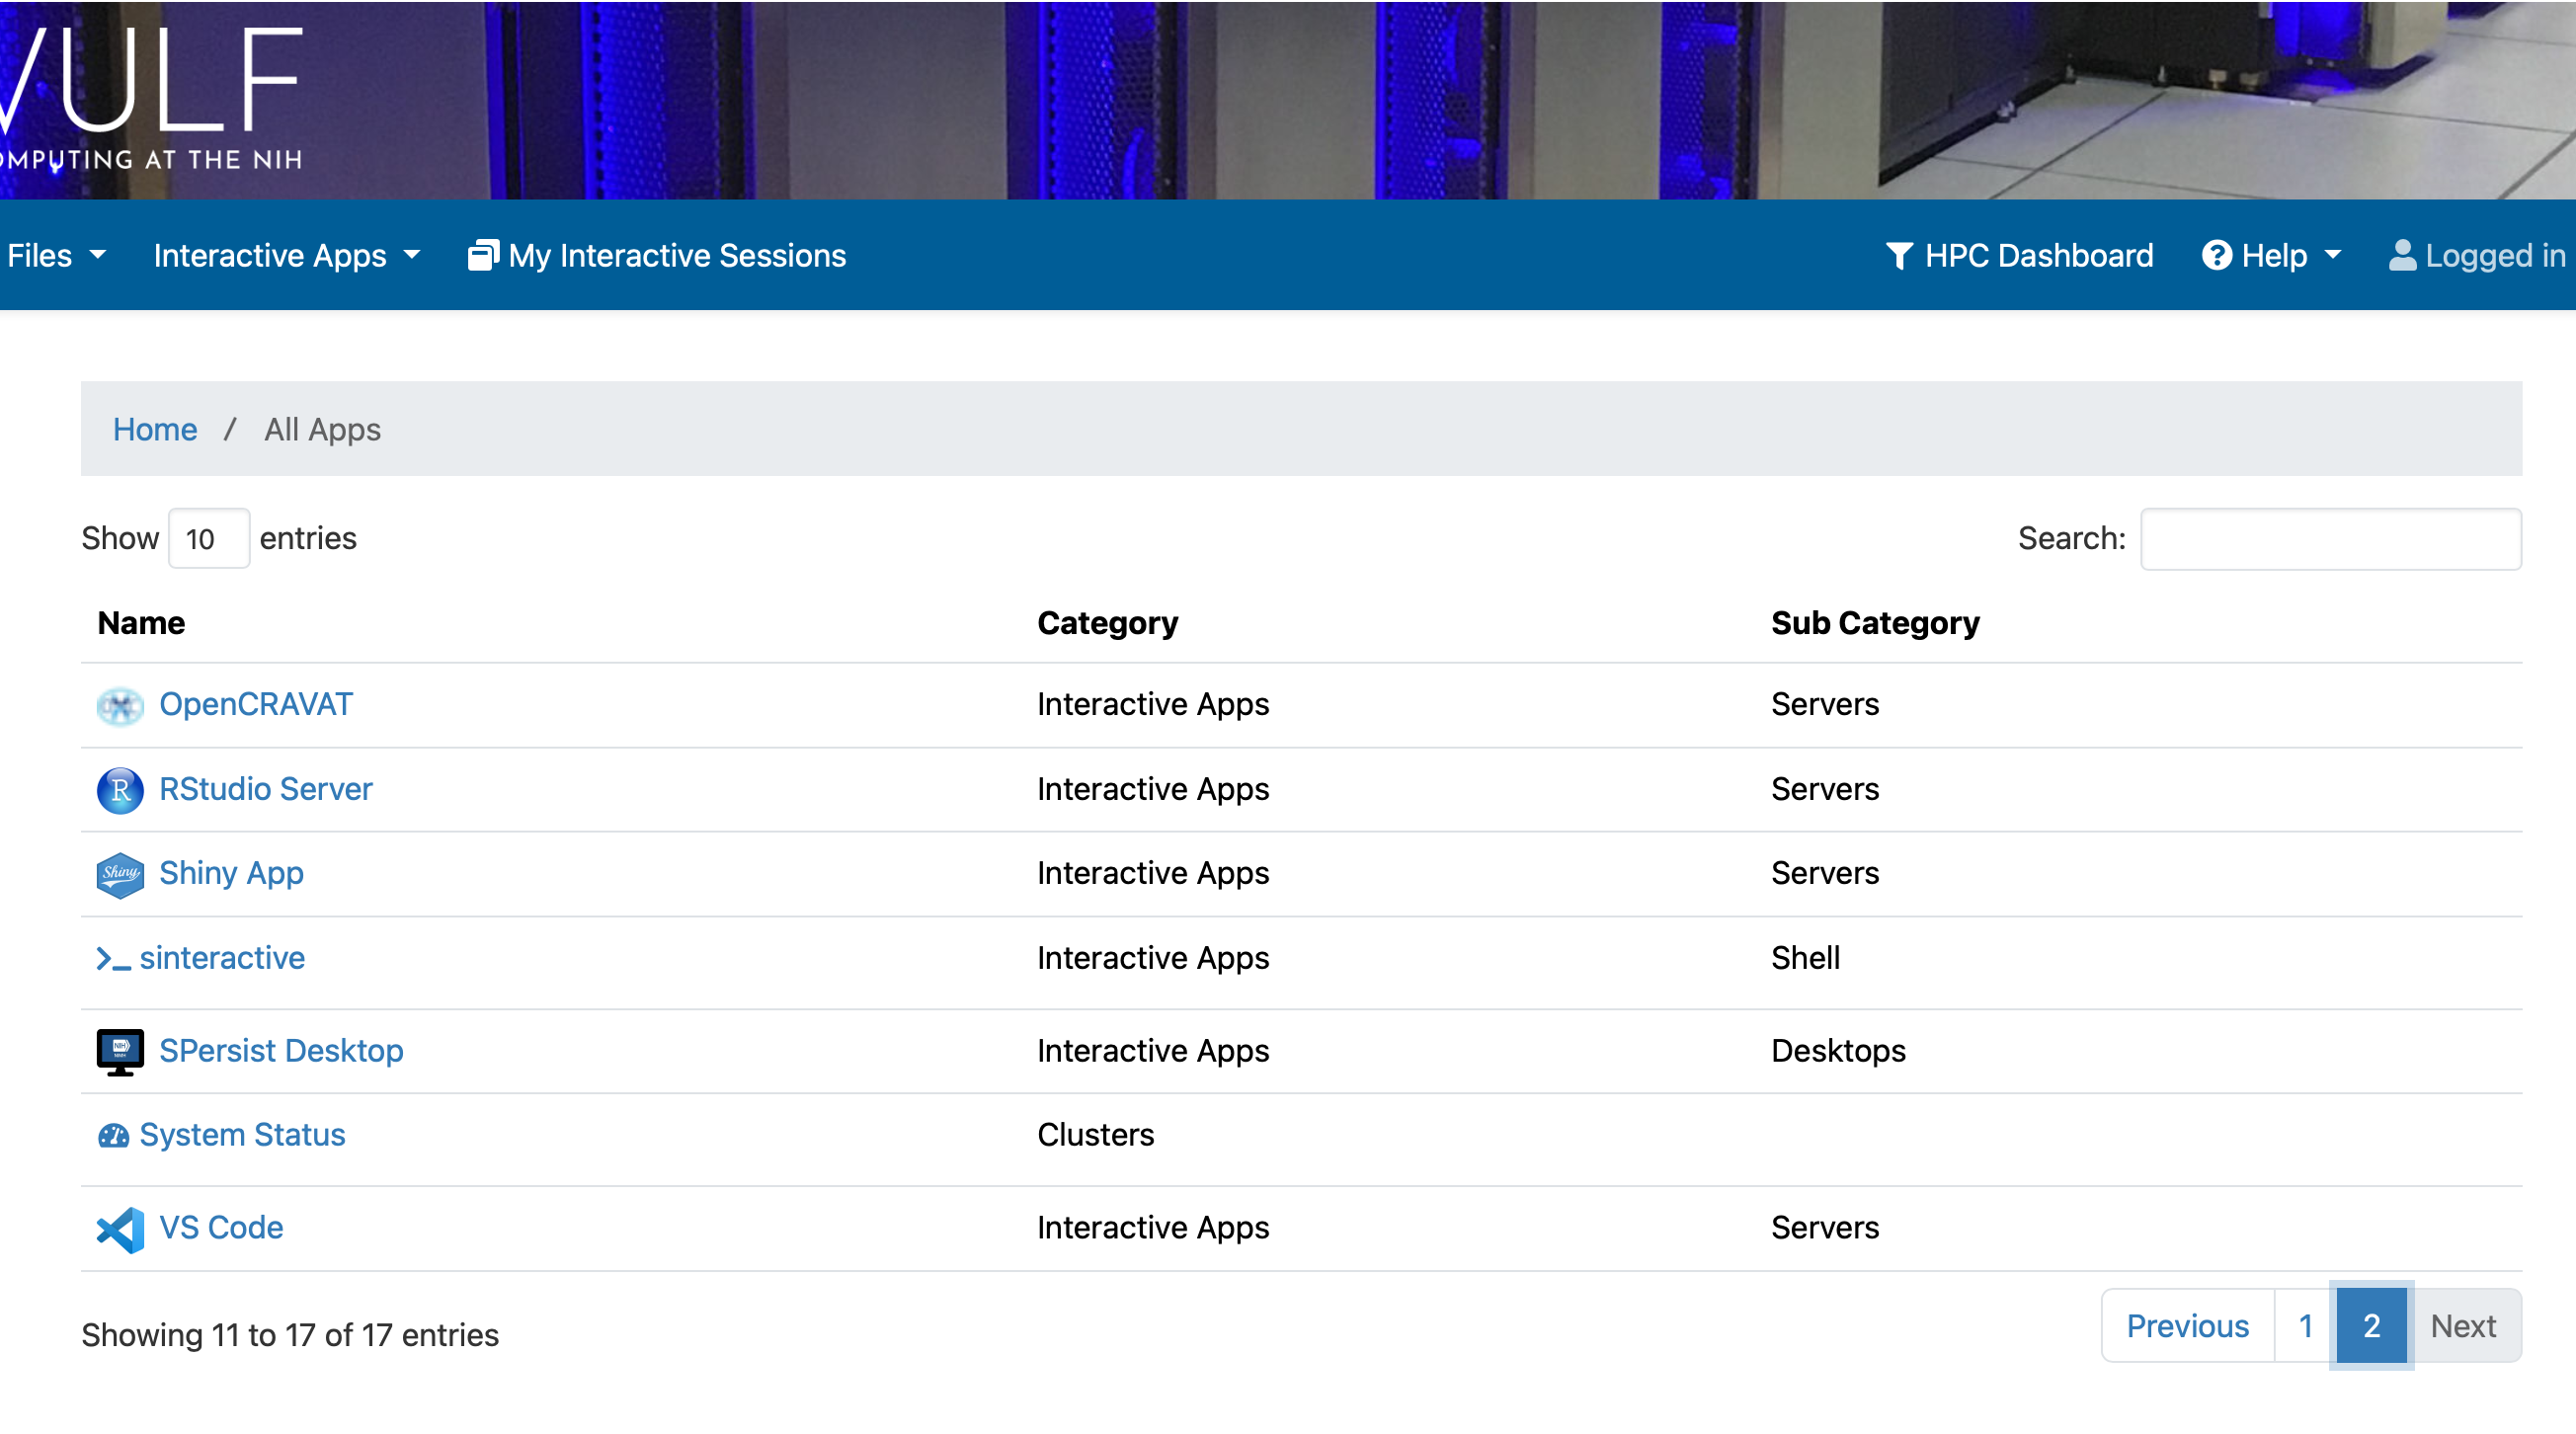
From the home page, click "Interactive Apps" in the top navigation bar and select "All Apps", or click the "all available apps" link on the home page. A paginated list of all available applications will appear.
Step 3 — Navigate to Page 2 to Find the Shiny App
The Shiny App may not appear on the first page. Click "2" or "Next" at the bottom-right corner of the app list to go to page 2. Locate and click on "Shiny App".
Step 4 — Configure the Shiny App Session
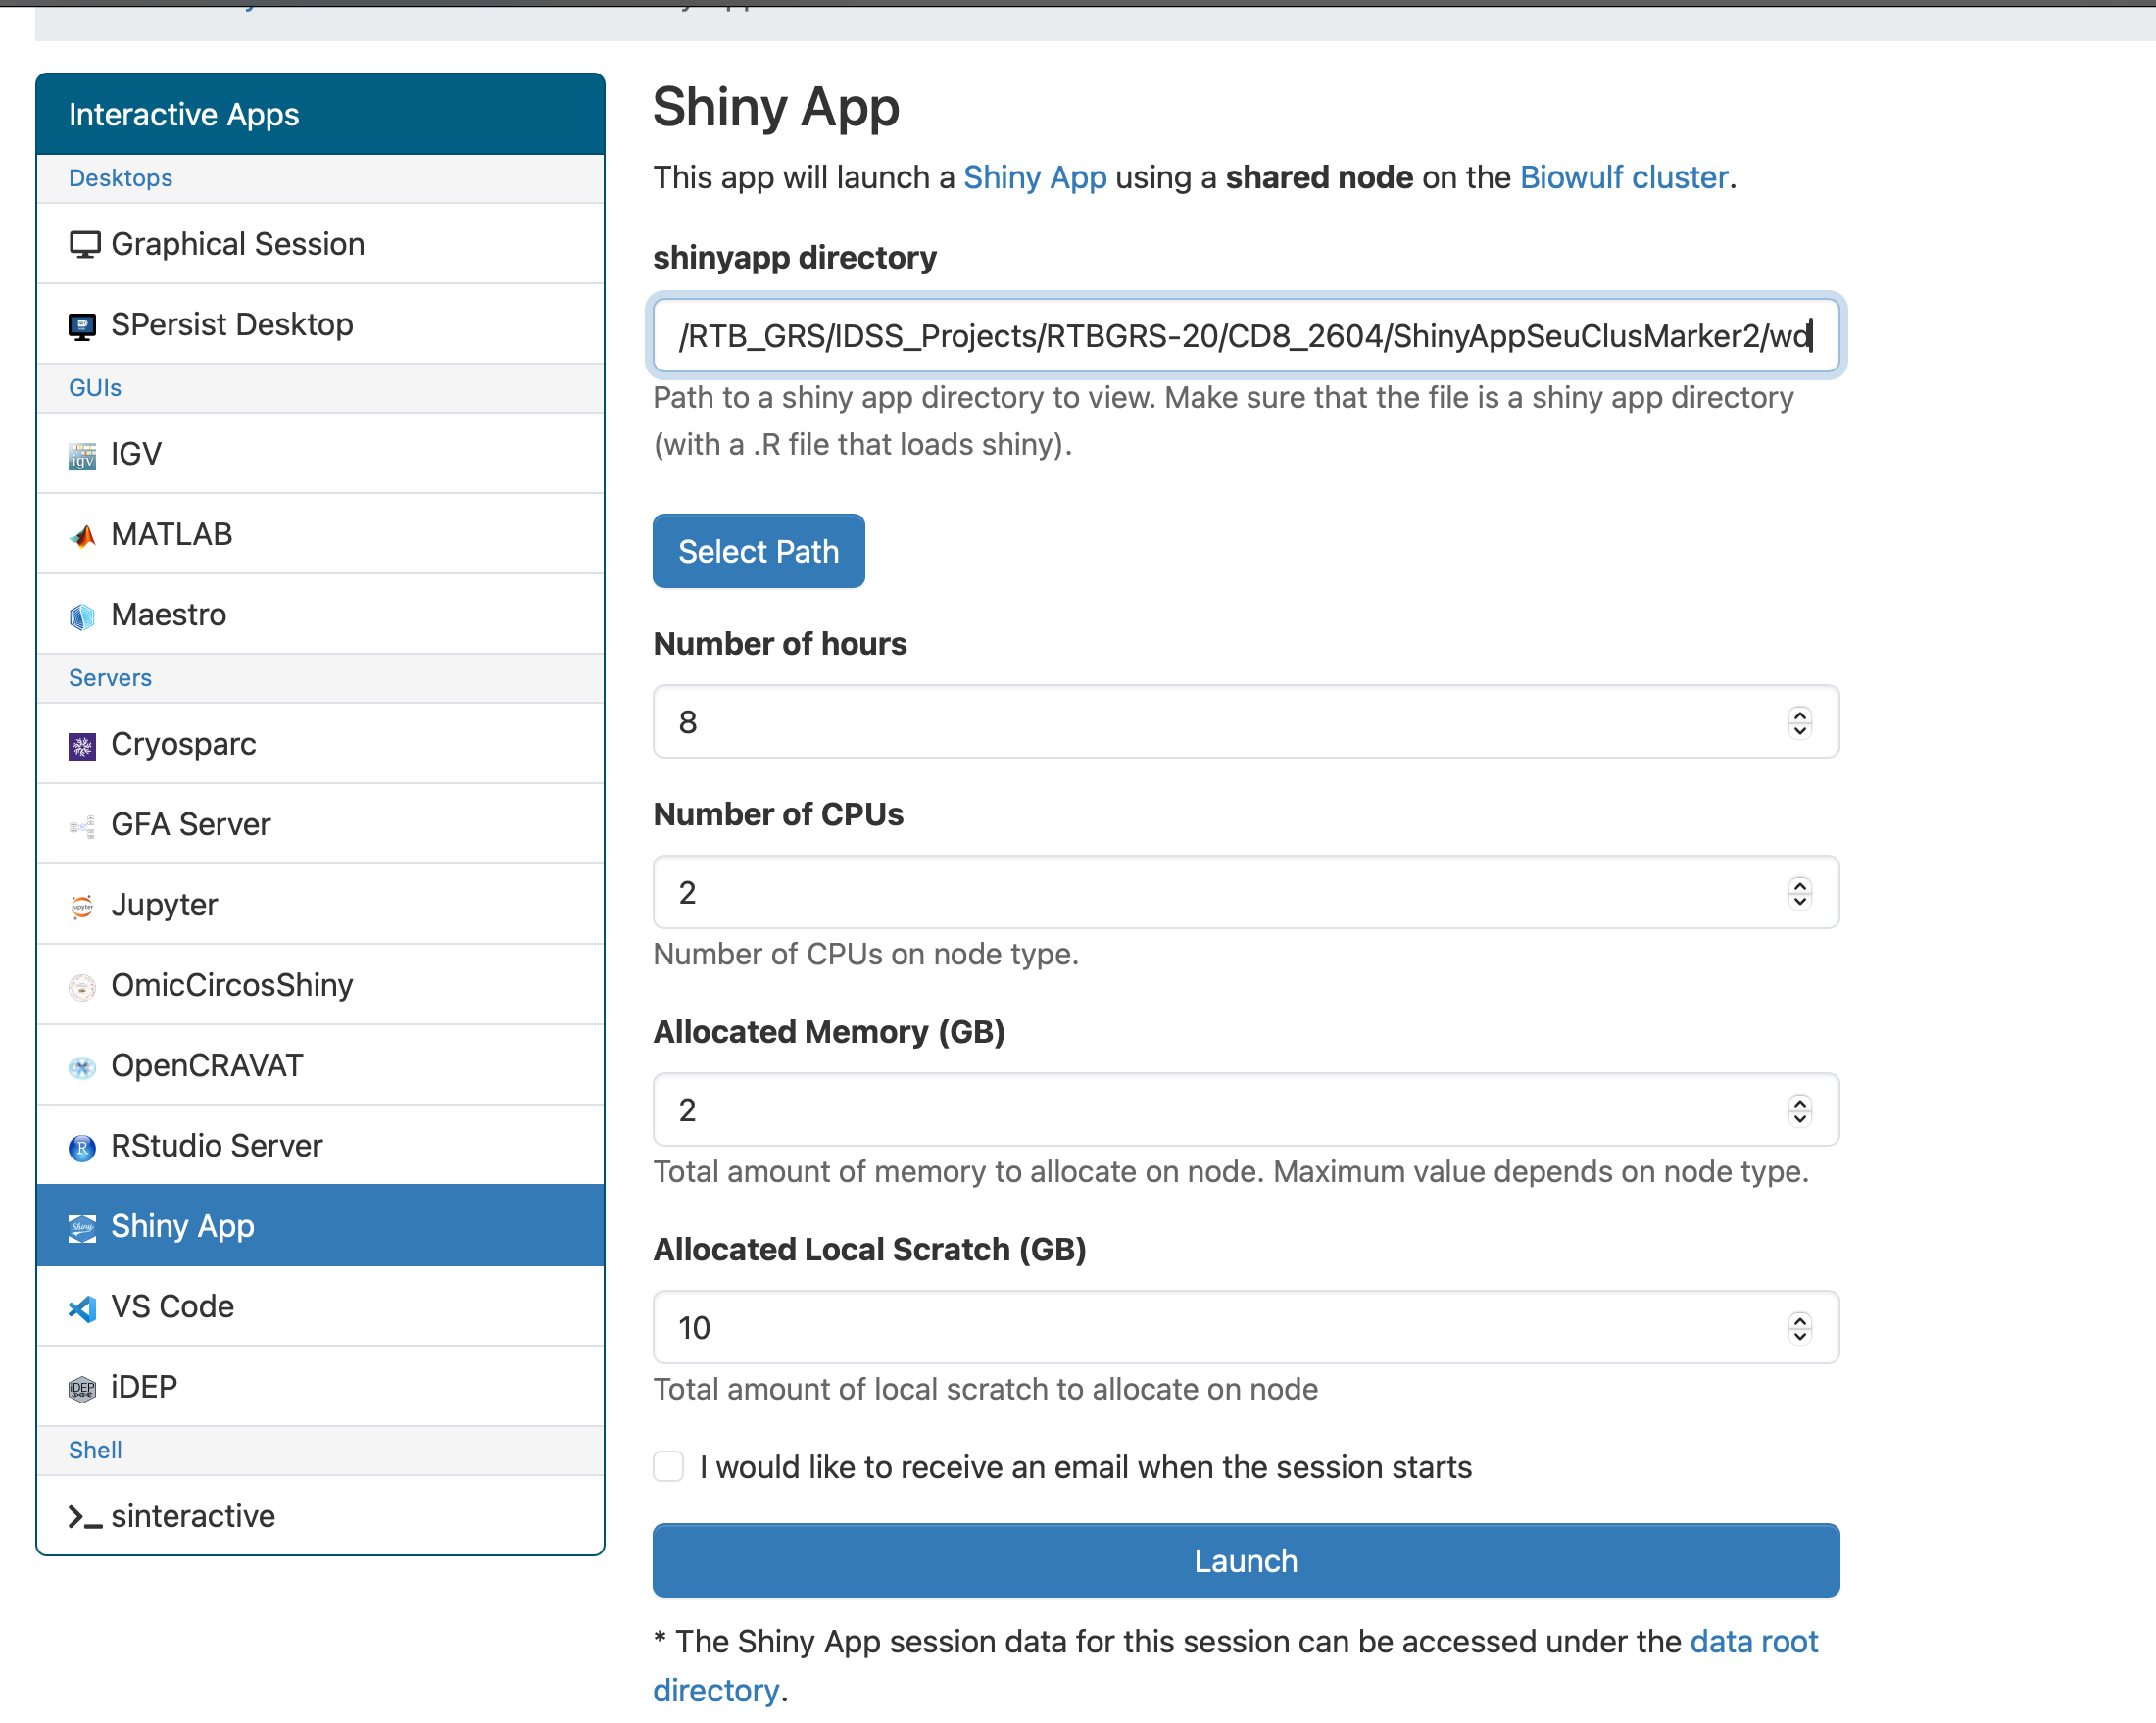
The Shiny App configuration form will open. Fill in the fields as follows.
① Shiny App Directory — Paste the path provided to you by the bioinformatics team into the "shinyapp directory" field:
[ Your path will be provided — e.g. /RTB_GRS/IDSS_Projects/RTBGRS-20/CD8_2604/ShinyAppSeuClusMarker2/wd ]
You can also use the "Select Path" button to browse the file system manually.
② Recommended settings:
| Setting | Recommended Value | Notes |
|---|---|---|
| Number of Hours | 4–8 hours | Set based on how long you plan to explore |
| Number of CPUs | 2 | Default is sufficient |
| Allocated Memory (GB) | 20 GB | ⚠️ Increase from default 2 GB — required for single-cell data |
| Allocated Local Scratch (GB) | 10 | Default is fine |
⚠️ Important: Single-cell datasets can be large. Setting Allocated Memory to at least 20 GB is strongly recommended to prevent the app from crashing or running slowly.
Once all fields are filled in, click the large "Launch" button at the bottom of the form.
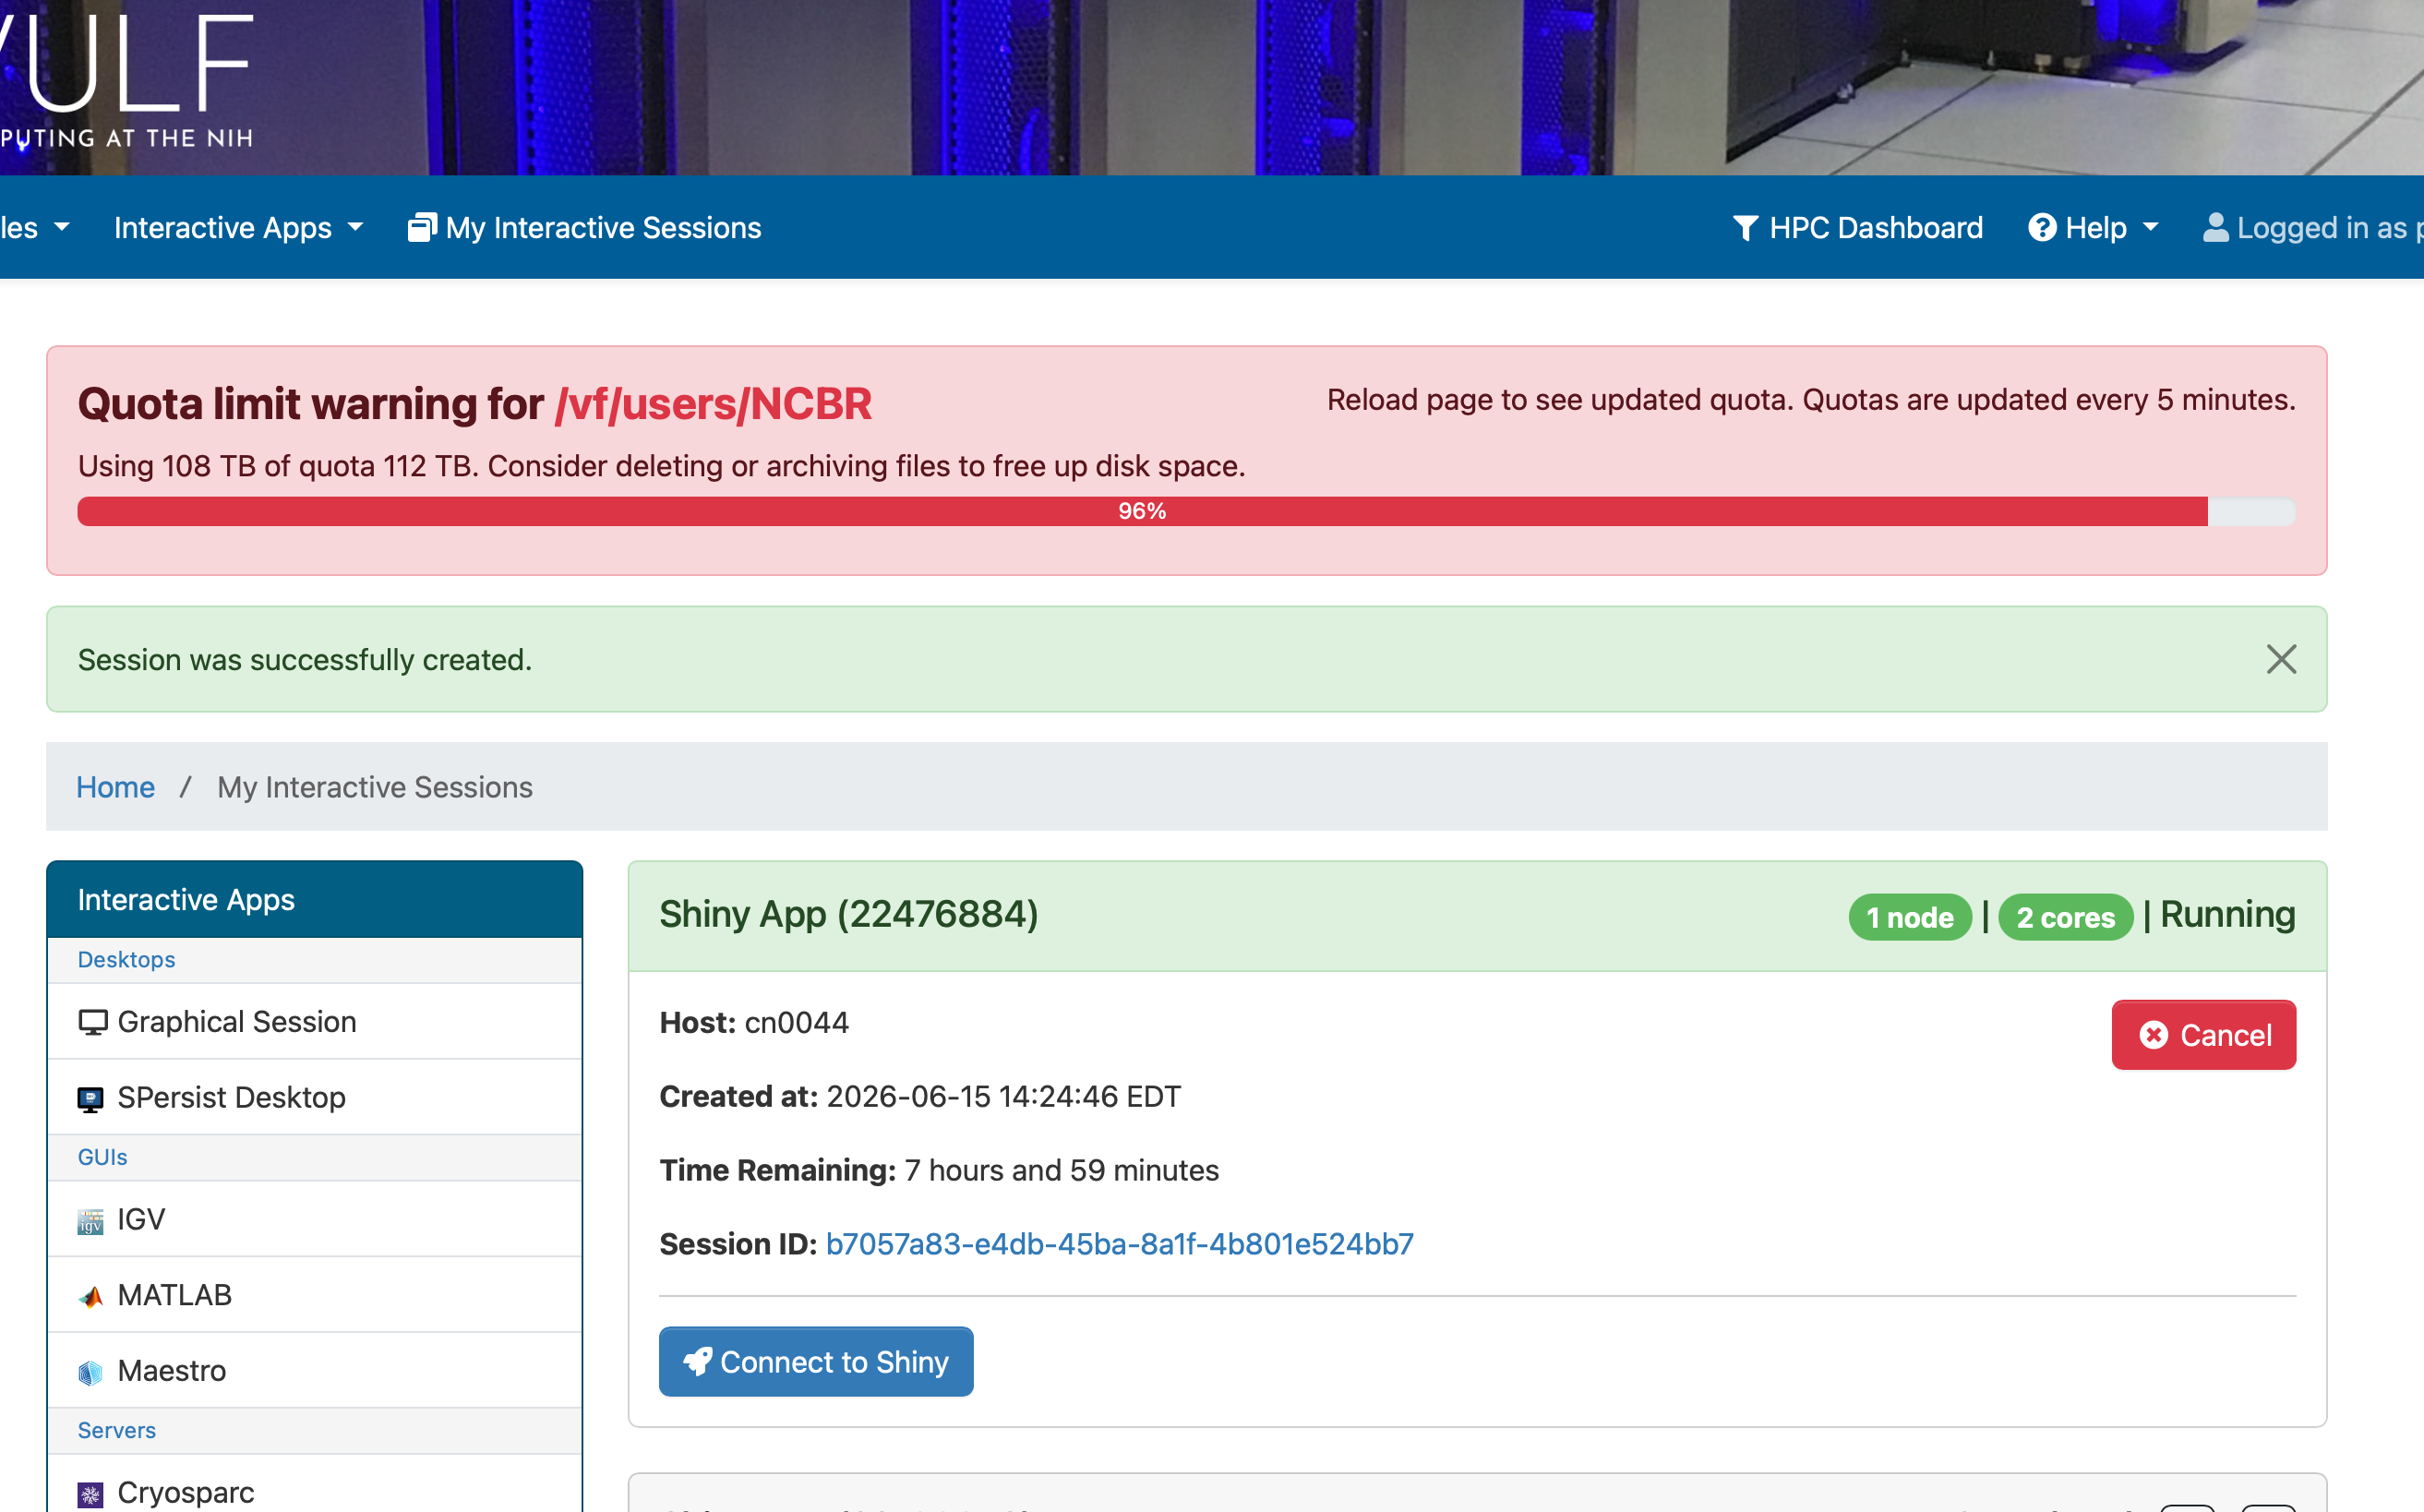
Step 5 — Wait for the Session to Start, Then Connect
After clicking Launch, you will be redirected to the My Interactive Sessions page. Biowulf needs to allocate resources for your session — this typically takes 1–2 minutes. A green banner will confirm the job was submitted successfully:
✅ "Session was successfully created."
⏳ Please be patient. Do not click Launch again. If the "Connect to Shiny" button does not appear after a couple of minutes, refresh the page using your browser's reload button.
Once the session is running, a blue "Connect to Shiny" button will appear on the session card. Click it to open the interactive app in a new browser tab.
🎉 You're in!
The Shiny app will open in your browser. You can now interactively explore your single-cell analysis results — browse clusters, view marker genes, generate plots, and more.
⏳ A note on loading times
Depending on the number of cells in your dataset, some tabs may take a moment to render — particularly pages that display multiple figures side by side, such as the Dimensionality Reduction (DimRed) page. This is completely normal and expected for large datasets. We kindly ask for your patience while the visualizations load; they will appear shortly.
For smaller datasets with fewer cells, most views will load instantly.
Session management
Your session will run for the number of hours you specified. To end early, return to My Interactive Sessions and click "Cancel". Unused sessions still consume cluster resources, so please cancel when finished.
NIH · Biowulf HPC OnDemand · hpcondemand.nih.gov | HPC Support: hpc.nih.gov | For analysis questions, contact your bioinformatics team